






Combining Lovable.dev with Latenode: Build Automation-Rich Extensions
Connect a Lovable-built extension UI to Latenode workflows for CRM sync, email automation, and 500+ app integrations — at 90% lower cost than Zapier.
Article content
Lovable builds your extension UI in hours. Latenode adds the automation layer in minutes. Together, they let you create powerful Chrome extensions that can sync to over 500 apps, send automated emails, and trigger complex workflows—all without touching backend code. Your Lovable extension is fast and beautiful, but what happens when you need to sync data to Airtable, send email sequences, or trigger actions across ten different apps? That's where the lovable latenode integration comes in. By adding a dedicated automation layer, your simple UI suddenly becomes a powerful business tool capable of sophisticated backend tasks.
This guide provides everything you need to know to combine these two powerful platforms. You will learn how to save over 95% on backend costs, build in days not months, and unlock powerful features by integrating your extension with CRMs, email marketing platforms, databases, and hundreds of other tools. With 75% of knowledge workers now using AI to save time, the demand for automated, intelligent extensions has never been higher. Here's exactly how to build them.
What is Latenode? (Quick Primer)
Latenode is a no-code/low-code workflow automation platform, similar to well-known tools like Zapier, Make, and n8n. It allows you to visually connect different applications and services to automate tasks. At its core, it operates on a simple but powerful trigger-and-action model: when a specific event happens (the trigger), Latenode automatically performs a series of predefined steps (the actions). For indie makers, it serves as a powerful, cost-effective serverless backend.
What truly sets Latenode apart for extension developers is its pricing model and developer-friendly features. While competitors charge per 'task' or 'operation'—meaning every single step in a workflow costs you—Latenode charges for total processing time. One credit buys you 30 seconds of CPU time, during which you can run unlimited nodes or operations. For complex, multi-step automations common in extensions, this results in massive cost savings. For example, a 100,000-operation workflow that costs over $700 on Zapier costs just $19 on Latenode — a margin that matters even more for solo makers shipping micro-SaaS in 2026.
How Lovable + Latenode Work Together
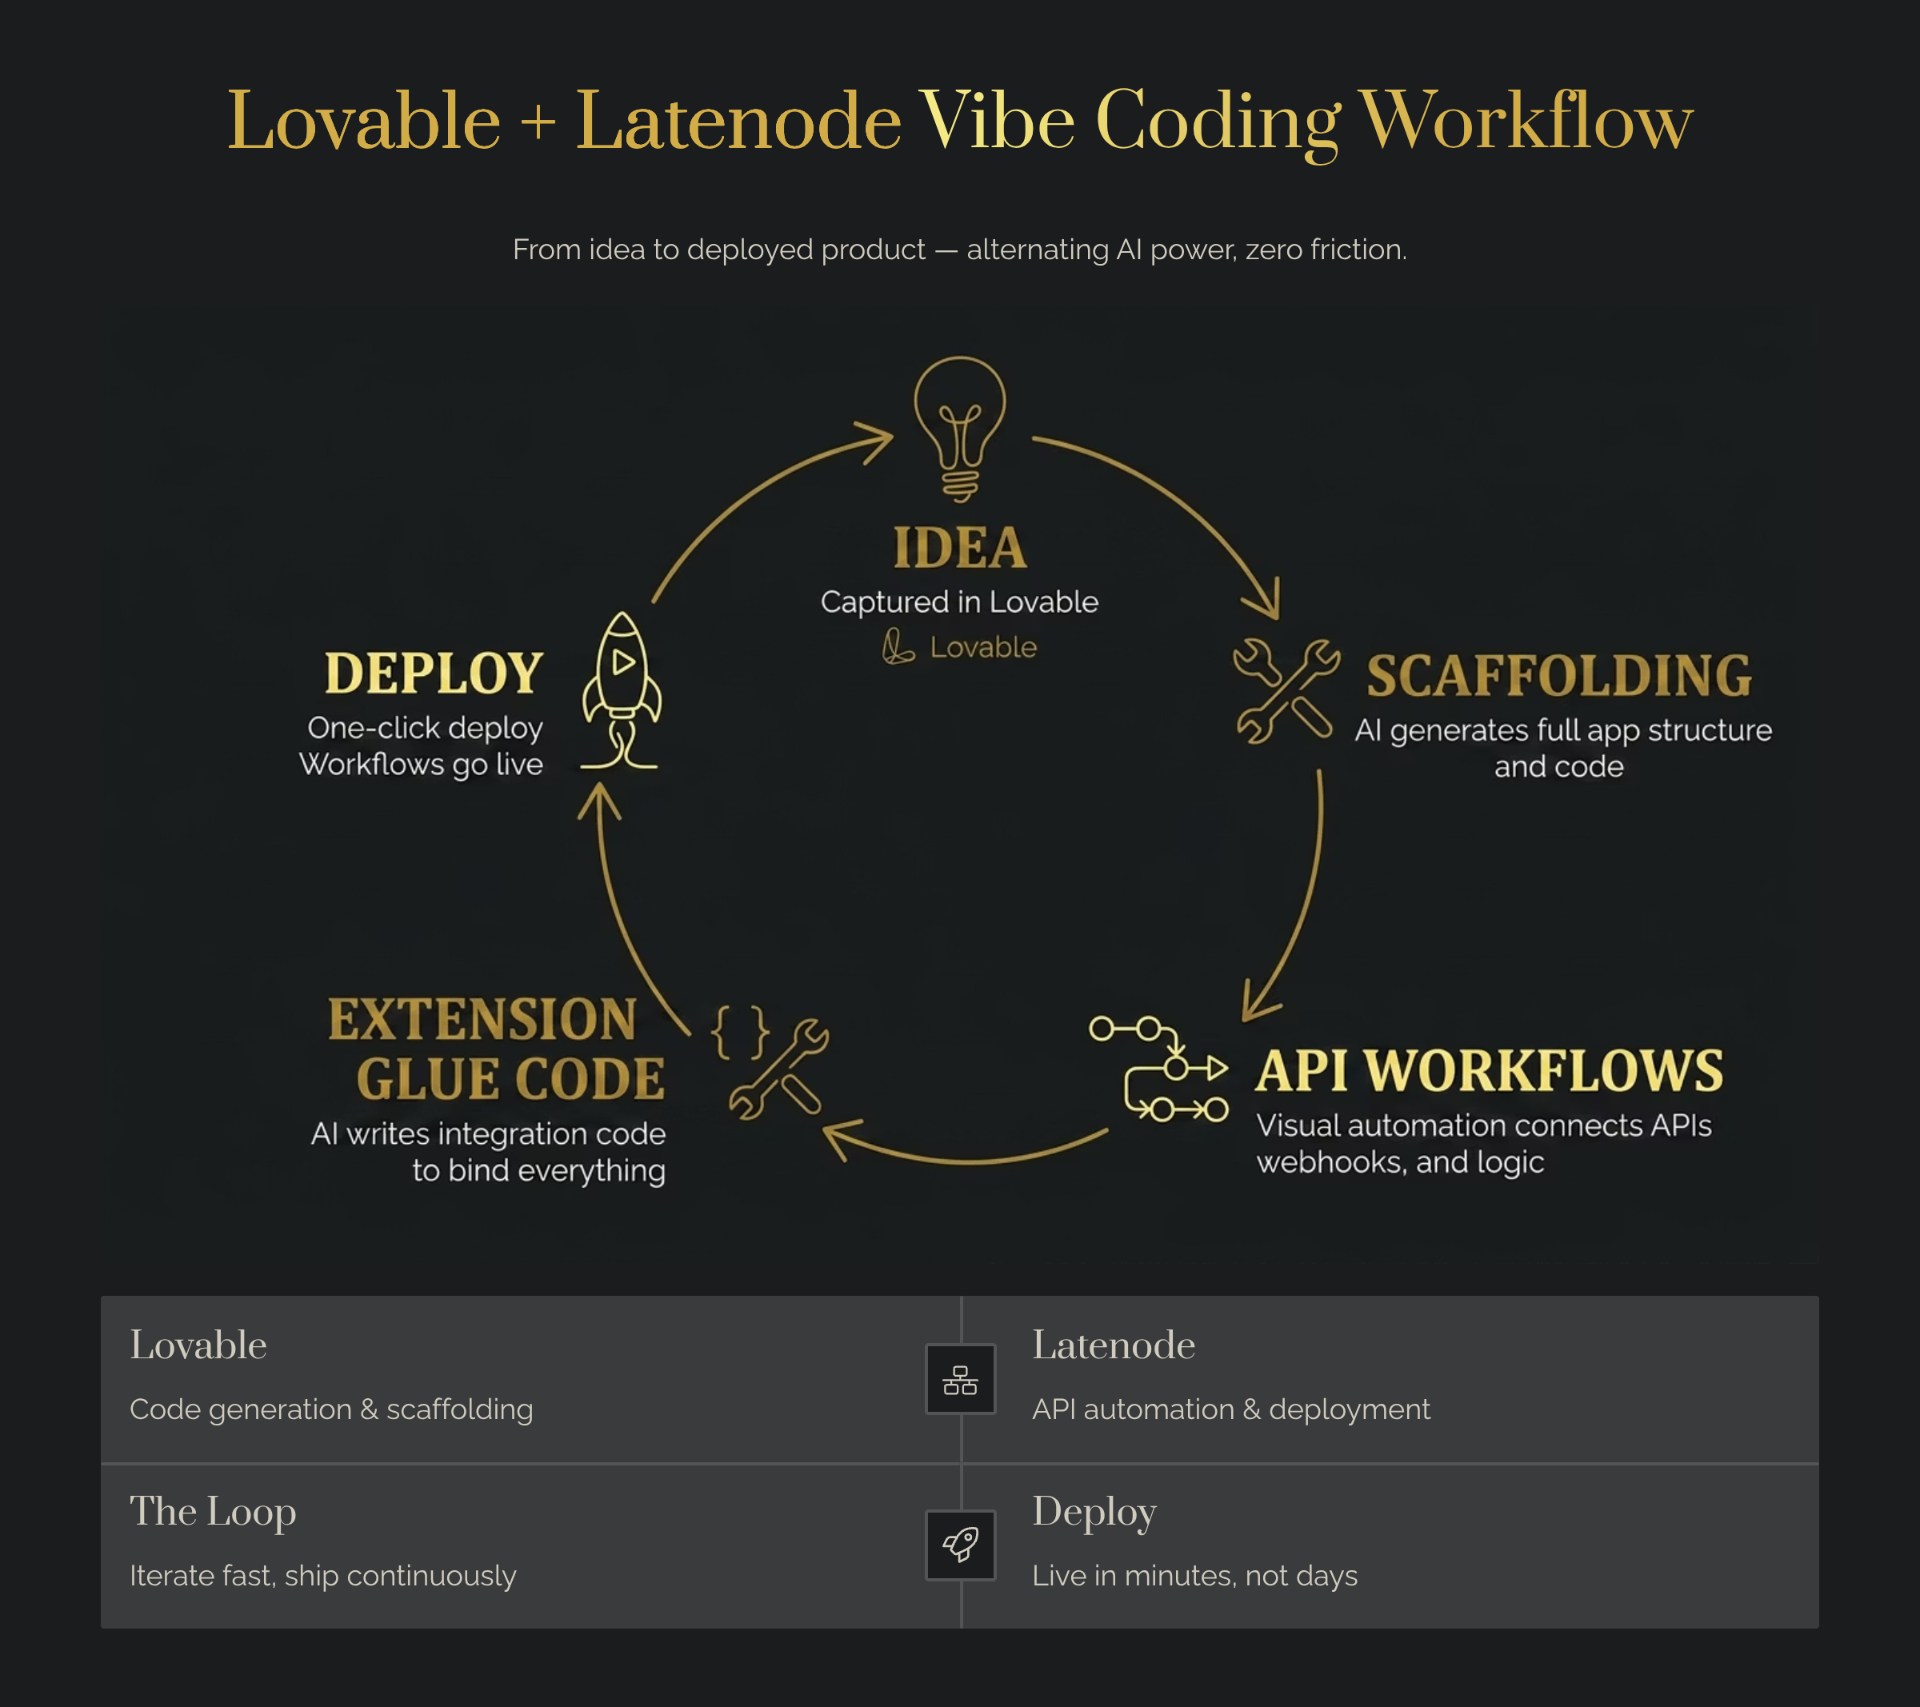
The easiest way to understand the lovable latenode integration is to think of it as a clean separation of concerns: Lovable is your frontend, and Latenode is your backend. This architecture allows you to build a beautiful, responsive user interface with Lovable's AI, while offloading all the complex, multi-step automation and data processing to Latenode's powerful workflow engine. If you're still weighing builders, our head-to-head of Lovable, MindStudio, and Bolt breaks down which one best fits each layer of the stack.
Here's how the data flows in a typical integration:
- User Action: The user interacts with your Chrome extension's UI, for example, by clicking a button to 'Start Email Sequence.'
- Lovable Sends Webhook: The Lovable frontend captures this event and makes a fetch call to a unique Latenode webhook URL, sending along any necessary data in a JSON payload.
- Latenode Executes Workflow: Latenode receives the webhook and triggers a predefined automation workflow. This could involve adding a subscriber to your MailerLite audience, sending a personalized email sequence, and creating a new lead in Salesforce.
- Latenode Responds: Once the workflow is complete, Latenode sends a response back to the Lovable extension, typically indicating success or failure.
- Lovable Updates UI: The Lovable frontend receives this response and updates the UI accordingly, showing a 'Success!' message or a detailed error notification.
Step-by-Step Integration: Building a Real Example
Let's walk through how to connect Lovable and Latenode with a practical example: a lead capture extension that takes a name and email from a form and triggers an email sequence.
Step 1: Build the UI in Lovable (2-3 hours)
First, use Lovable's AI prompter to generate a simple UI. Create a form with two input fields (name, email) and a 'Submit' button. Add basic form validation to ensure the fields are not empty and the email is in a valid format.
Step 2: Create the Automation in Latenode (1-2 hours)
In your Latenode account, create a new scenario. The first node will be a Webhook trigger. Latenode will provide you with a unique URL for this webhook. Add subsequent nodes for your workflow, such as a 'Send Email' node using the Gmail connector and a 'Create Record' node using the Airtable connector.
Step 3: Connect Lovable to Latenode via Webhook (2-3 hours)
This is the core of the lovable latenode integration. In your Lovable project, create a JavaScript function that will be called when the form's 'Submit' button is clicked. This function will use the fetch API to send a POST request to the Latenode webhook URL you obtained in Step 2.
Practical Use Cases: What Extensions Benefit from Latenode?
Adding a Latenode automation layer can transform a simple UI into a valuable business tool. Here are several practical use cases for Chrome extensions that benefit from a lovable latenode integration — many of them are the exact patterns that work well for solo extension makers chasing high-retention niches:
- CRM Sync Extensions: A LinkedIn scraper that captures profile data. Lovable builds the UI to display the data and a 'Sync to CRM' button. Latenode handles creating leads in Salesforce, updating contacts in HubSpot, and sending notifications to Slack.
- Content Distribution Tools: For content creators, an extension that publishes to multiple platforms at once. The user writes a post in a simple UI built with Lovable. On clicking 'Publish,' a Latenode webhook triggers a workflow that posts the content to Medium, LinkedIn, and Substack simultaneously.
- Data Collection and Reporting: An extension that allows users to fill out a form on any webpage. Lovable creates the form, but Latenode does the heavy lifting—adding rows to Google Sheets, performing calculations, and emailing summary reports.
- Email Automation and Lead Nurturing: Build an extension that lets you add contacts to a predefined email sequence. The Lovable UI is just a simple form, but Latenode manages the entire sequence: sending emails, waiting, checking replies, and sending follow-ups.
Cost Analysis: Lovable + Latenode vs. Alternatives
For indie makers, cost is a critical factor. The combination of Lovable and Latenode is not only faster but also significantly cheaper than alternatives. Here's a breakdown for a typical extension with 10,000 workflows per month:
| Stack / Service | Monthly Cost | Notes |
|---|---|---|
| Lovable + Latenode | $44 | Lovable Pro ($25) + Latenode Start ($19). Handles 10,000 complex workflows. |
| Lovable + Zapier | $114 | Lovable Pro ($25) + Zapier Professional ($89 for 50k tasks). 2.6x more expensive. |
| Lovable + Make | $441 | Lovable Pro ($25) + Make Pro ($416 for 50k operations). 10x more expensive. |
| Hiring a Backend Developer | $1,000 - $5,000+ | Part-time freelance rate for backend maintenance, bug fixes, and new features. |
Getting Started: Your First Lovable + Latenode Extension
Ready to build? Here's how to get started with your first project. The best way to learn is by building a simple but useful extension that covers the end-to-end integration workflow. If you're new to Lovable, start with our Claude tutorial for building extensions in 30 minutes to learn the prompt-based workflow.
Recommended Starter Idea: The 'Smart Notifier' Extension — A simple form in the extension popup allows you to type a message. When you click 'Send,' it sends that message to both a Slack channel and your personal email. This is simple, immediately useful, and teaches you the core integration pattern. Time estimate: 4-6 hours.
Conclusion: The Unfair Advantage for Indie Makers
The integration of Lovable and Latenode represents more than just a technical convenience; it's a strategic advantage for indie makers and vibe coders. For years, the barrier to building feature-rich applications wasn't the frontend—it was the complex, expensive, and time-consuming backend. This stack effectively removes that barrier. By combining Lovable's rapid UI development with Latenode's incredibly cost-effective and powerful automation engine, you can now build and launch sophisticated Chrome extensions in a fraction of the time and at a fraction of the cost. Just don't skip the basics — most failed builds trip over the 7 most common vibe coding mistakes before they ever ship. When you're ready to add subscription billing, Outseta plugs in seamlessly as an all-in-one membership and payment layer.
For more vibe coding strategies and tool comparisons, return to our Vibe Coding Chrome Extensions guide. For a deep dive into using Claude to rebuild expired extensions with proven demand, see our Claude guide for Chrome extensions.